
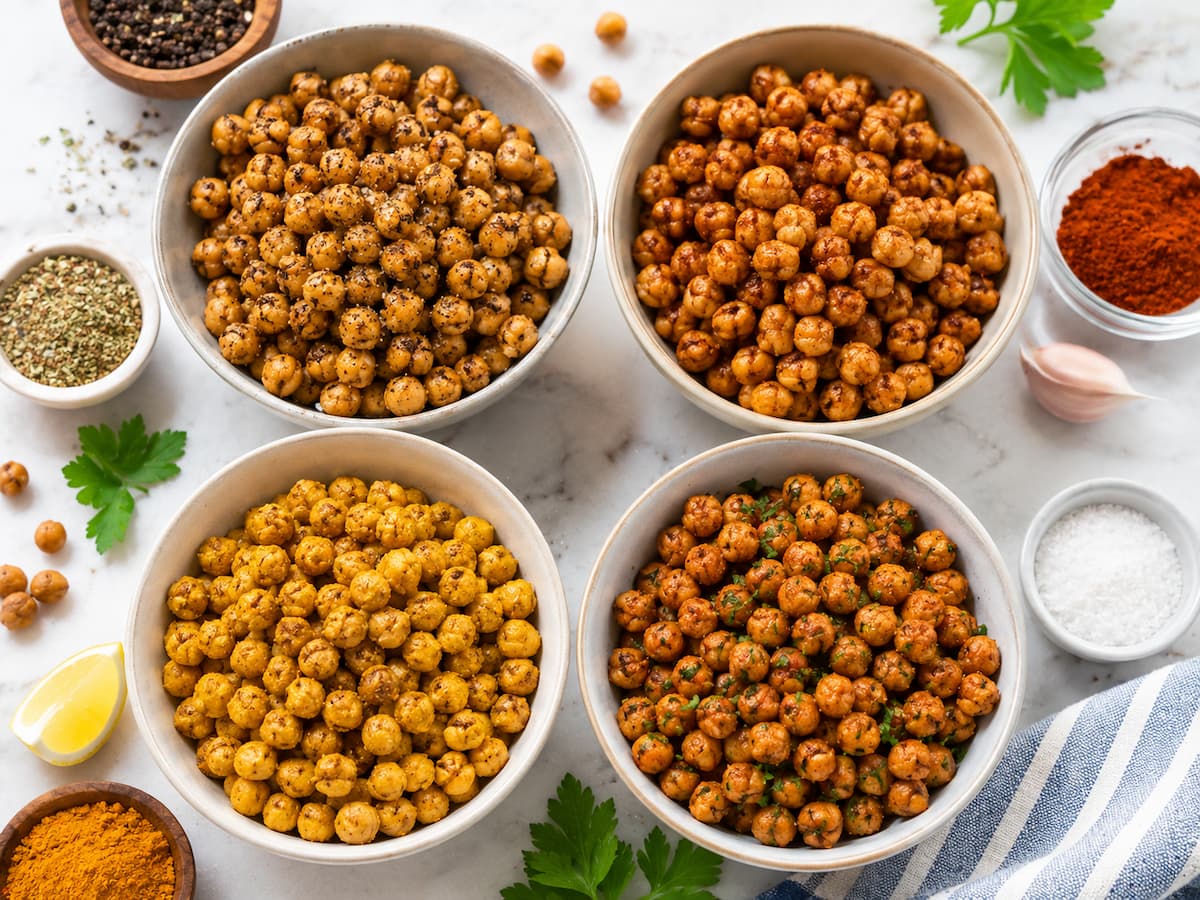
People are surprised by roasted chickpeas. They start as a pantry staple for soups or salads, but they become crispy bits that are hard to stop eating with a little baking. They are crisp enough for snacking yet adaptable enough to sprinkle over grain bowls, combine into lunch boxes, or serve with dips for a casual gathering.
Roasting chickpeas for the first time can be surprising. One batch may be crunchy, while the next is chewy after a few hours. Differences are usually in the details, not the recipe. Moisture, oven temperature, pan size, and seasoning timing affect texture. Understanding those details makes this recipe a reliable one.
Chickpeas with a crisp shell without burning are the centerpiece of this rendition. You’ll also find four simple seasoning blends that radically change the flavor without cooking. Smoky, savory, and mildly sweet, each variant starts with the same simple base recipe, making it easy to make multiple flavors from one batch.
Why This Recipe Works Better
Roasting chickpeas seems simple—drain, season, bake—but there’s some culinary science involved. Freshly canned chickpeas are wet inside and out. If moisture isn’t removed before roasting, beans steam rather than crisp. Even after a long bake, moist chickpeas wrinkle instead of being crisp.
Thoroughly drying them changes everything. The oven can slowly evaporate chickpea water after surface moisture vanishes. That lengthy drying provides the fragile shell that fractures nicely when eaten into. Another factor: oil. A thin coating conducts heat and promotes consistent browning, while too much oil might do the reverse. Because oil reduces moisture evaporation, chickpeas may stay soft instead of crisping. A small bit usually suffices. Remember that roasted chickpeas vary after baking. Hot, they seem mildly crisp, but after chilling for 10–15 minutes, trapped steam makes them crunchier.
Ingredients
For the Base Recipe
- 2 cans (15 ounces each) of chickpeas
- 1½ tablespoons olive oil
- ½ teaspoon fine sea salt
Optional Finishing Ingredients
- Freshly ground black pepper
- Fresh herbs for garnish
- Lemon zest
- Grated Parmesan cheese
- Extra virgin olive oil for finishing, if desired
The ingredient list is intentionally short because the seasoning blends provide most of the personality.
A Quick Preparation Checklist
Before preheating the oven, spend a few minutes preparing the chickpeas properly.
- Drain the canned chickpeas.
- Rinse thoroughly under cold water.
- Remove any loose skins that naturally fall away.
- Dry completely using a clean kitchen towel or paper towels.
- Allow them to air dry for another five minutes if they still feel damp.
These small steps often determine whether your finished snack stays crisp for hours or softens almost immediately.
Ingredient Spotlight: Why Chickpeas Roast So Well
Chickpeas are naturally dense, which allows them to develop a crisp exterior while keeping just enough tenderness inside to avoid becoming rock hard. Their mild flavor also makes them an ideal canvas for different spices. Unlike stronger beans, chickpeas readily absorb seasonings without competing against them.
Canned chickpeas are especially convenient because they’re already fully cooked. That means the oven’s job isn’t to cook them through—it simply removes moisture and develops color. If using dried chickpeas instead, they should be cooked until tender before roasting. Undercooked chickpeas remain unpleasantly firm regardless of how long they’re baked.
Equipment That Makes the Process Easier
You don’t need specialized equipment, but a few kitchen basics make a noticeable difference. A large rimmed baking sheet provides enough room for the chickpeas to spread into a single layer. Crowding them together traps steam, preventing proper browning. A large mixing bowl helps coat the chickpeas evenly with oil before roasting. A clean cotton kitchen towel is surprisingly useful because it absorbs moisture much more effectively than a quick rinse-and-drain alone. Finally, an oven with reliable temperature control helps produce consistent results. Even ovens that run slightly hot or cool can work well—you may simply need to adjust the roasting time by a few minutes.
Step-by-Step Instructions
Step 1: Heat the Oven
- Preheat the oven to 400°F (200°C).
- Allow it to reach full temperature before placing the chickpeas inside. Starting in a properly heated oven helps the drying process begin immediately.
Step 2: Prepare the Chickpeas
- Drain the canned chickpeas into a colander and rinse well under cool running water.
- Transfer them to a clean towel.
- Gently rub the chickpeas between the folds of the towel. You’ll notice several thin skins peeling away naturally.
- Removing every skin isn’t necessary. Simply discard the loose ones and continue drying until the chickpeas no longer feel damp.
- This stage may seem minor, but it’s one of the biggest differences between average roasted chickpeas and exceptionally crisp ones.
Step 3: Coat Lightly with Oil
- Place the dried chickpeas into a large bowl.
- Add the olive oil and salt.
- Toss gently until every chickpea has a light, even coating.
- There shouldn’t be excess oil collecting in the bottom of the bowl. If there is, you’ve probably added more than necessary.
Step 4: Arrange for Even Roasting
- Spread the chickpeas across a baking sheet in a single layer.
- Leave a little space between them whenever possible.
- As they roast, hot air needs room to circulate around each chickpea. Packing them tightly together creates pockets of steam that slow the crisping process.
Step 5: Roast Slowly
- Bake for 35 to 45 minutes.
- Every ten to fifteen minutes, carefully shake the baking sheet or stir the chickpeas with a spatula.
- As roasting continues, you’ll notice several changes.
- First, the chickpeas become slightly darker.
- Then their skins begin tightening around the surface.
- Near the end of cooking, many develop tiny cracks that indicate the moisture inside has mostly evaporated.
- These visual cues are often more reliable than simply watching the clock.
Step 6: Let Them Cool
- Remove the baking sheet from the oven.
- Resist the urge to sample them immediately.
- Allow the chickpeas to cool for about ten minutes before judging their texture.
- Many batches become significantly crispier during this short resting period.
Four Easy Seasoning Ideas
One of the best things about roasted chickpeas is that the base recipe remains exactly the same. Once the chickpeas are roasted, you can divide them into separate bowls and season each portion differently.
1. Smoky Paprika and Garlic
This is often the first flavor people try because it’s simple and complements the natural nuttiness of chickpeas. Mix together:
- 1 teaspoon smoked paprika
- ½ teaspoon garlic powder
- ¼ teaspoon onion powder
- Pinch of black pepper
- Small pinch of salt if needed
The smoky aroma becomes more pronounced after the chickpeas cool slightly, while the garlic creates a savory finish without overwhelming the other flavors. This version pairs especially well with tomato soup, sandwiches, or as a crunchy topping for avocado toast.
2. Parmesan Herb Blend
If you’re looking for something that feels a little richer, Parmesan and herbs create an almost cracker-like flavor. Combine:
- 2 tablespoons finely grated Parmesan cheese
- ½ teaspoon dried Italian seasoning
- ¼ teaspoon garlic powder
- Freshly cracked black pepper
Instead of tossing the cheese on immediately, let the chickpeas cool for about five minutes first. The residual warmth gently melts the Parmesan onto the surface without causing it to clump excessively. These seasoned chickpeas make an excellent addition to Caesar salads or roasted vegetable bowls.
3. Cinnamon Maple Crunch
Roasted chickpeas aren’t limited to savory recipes. For a lightly sweet snack, combine:
- 1 teaspoon maple syrup
- ½ teaspoon ground cinnamon
- Tiny pinch of sea salt
- Pinch of nutmeg (optional)
Because maple syrup introduces extra moisture, spread the coated chickpeas back onto the baking sheet and return them to the oven for another 5 to 7 minutes. During those final minutes, the syrup caramelizes slightly, creating a delicate coating rather than a sticky glaze. The aroma filling the kitchen at this stage is warm and comforting, with the cinnamon becoming more noticeable as the chickpeas cool.
4. Chili Lime Blend
For a brighter flavor with gentle heat, chili and lime are an excellent combination. Mix together:
- ½ teaspoon chili powder
- ¼ teaspoon smoked paprika
- Finely grated zest of one lime
- Small squeeze of fresh lime juice
- Pinch of sea salt
The key is restraint with the lime juice. Too much liquid softens the crisp exterior you’ve worked to create. A light squeeze is enough to brighten the spices while preserving the crunchy texture. This version works particularly well sprinkled over taco salads or rice bowls or enjoyed straight from the bowl when you’re craving something tangy instead of heavily salted.
How to Tell When They’re Truly Finished
The roasting time printed in recipes is only a guide because every oven behaves a little differently. Rather than relying entirely on the timer, watch for these signs. The chickpeas should be a rich golden color with occasional deeper brown spots. When shaken, they should feel noticeably lighter than when they first went into the oven. Their skins often appear slightly split or wrinkled, and they should roll freely across the baking sheet instead of feeling soft or heavy. Most importantly, allow them to cool before deciding whether they need more roasting. A batch that seems only moderately crisp while hot often reaches its best texture after resting for several minutes.
Understanding the Crunch: A Little Kitchen Science
One of the most common questions about roasted chickpeas is why they sometimes come out wonderfully crisp one day and disappointingly chewy the next, even when using the same recipe. The answer usually comes down to moisture. Every chickpea contains water trapped inside its dense structure. During roasting, that moisture slowly moves toward the surface and evaporates. If the oven temperature is too low, the water escapes too slowly, and the chickpeas tend to dry unevenly. If the temperature is too high, the outside can brown before the center has had time to lose enough moisture, leaving you with a crisp shell but a softer middle.
Humidity also plays a role after baking. On rainy or humid days, roasted chickpeas can absorb moisture from the air surprisingly quickly. That’s why they often taste their absolute best within the first few hours after roasting. Another detail many home cooks overlook is cooling. Chickpeas continue releasing steam after leaving the oven. If they’re immediately transferred into a sealed container while still warm, that trapped steam condenses into moisture, undoing much of the crispness you’ve just created. Letting them cool completely on the baking sheet gives them the best chance of staying crunchy.
Small Adjustments That Make a Noticeable Difference
Once you’ve made this recipe a few times, you’ll probably start making little adjustments based on how you like your roasted chickpeas. If you enjoy a lighter crunch that’s easier to bite into, remove them from the oven closer to the 35-minute mark. They’ll still be crisp but retain a slightly softer center. For a snack that’s closer to roasted nuts in texture, extending the roasting time by five or even ten minutes usually does the trick. Just keep an eye on the color during those final minutes, as the line between deeply roasted and overdone can be surprisingly short.
Pan-Choice also matters more than many people expect. A heavy metal baking sheet tends to promote more even browning than a dark nonstick pan, which may brown the bottoms more quickly. If you’re using parchment paper for easier cleanup, the chickpeas may need an extra minute or two in the oven compared to roasting directly on the pan. Finally, resist the temptation to overcrowd the baking sheet. It might seem harmless to fit one more can of chickpeas onto the tray, but that extra layer limits airflow and encourages steaming instead of roasting.
When Things Don’t Go as Planned
Even experienced cooks occasionally end up with a batch that isn’t quite right. Fortunately, roasted chickpeas are forgiving, and most problems are easy to fix.
| Issue | Likely Cause | Easy Solution |
|---|---|---|
| Chickpeas are chewy. | Not roasted long enough | Return them to the oven for another 5–10 minutes. |
| They softened after storage | Moisture entered the container. | Re-crisp in a 375°F (190°C) oven for 5–8 minutes. |
| Spices taste bitter. | Added before a long roast | Toss delicate spices on after baking. |
| Uneven browning | Baking sheet overcrowded | Spread them into a single layer next time. |
| Exterior burned | Oven temperature too high | Lower the temperature slightly or shorten the roasting time. |
It’s worth remembering that no two ovens behave exactly alike. If your first batch needs a few adjustments, don’t think of it as a failed recipe—it simply helps you learn how your own oven roasts.
More Than Just a Snack
Roasted chickpeas are obviously a great snack by the handful, but they can add texture and flavor to many everyday meals. Instead of typical croutons, sprinkle a small handful of them over creamy tomato soup for a lighter and more flavorful option. They also provide a nice bite to pureed vegetable soups, especially carrot, squash, or roasted red pepper types. Roasted chickpeas make salads a whole lot more interesting. “The crispy chickpeas add contrast to every bite and make the salad feel more satisfying than just lettuce and vegetables.”
Or they’re just as excellent in grain bowls with quinoa, brown rice, farro, or couscous. Add roasted veggies, a dollop of hummus, and a simple lemon dressing, then top with a generous sprinkle of crispy chickpeas for texture. If you’re making wraps or pita sandwiches, add the chickpeas immediately before serving. This will keep them crisp instead of letting them become soft against moist contents. Some people even use them on top of baked potatoes or creamy mac and cheese, where the crunch offers a great contrast to the richer foods.
Adapting the Recipe to Your Pantry
One reason this dish remains in regular rotation for so many home cooks is its adaptability. You seldom have to make a special shopping excursion. Olive oil gone? Avocado oil is a good choice because it is flavorless and has a high smoke point. If this is what you have, you can also use light vegetable oil. Kosher salt can be used as a simple replacement for fine sea salt; however, you might require a bit more due to the bigger size of the crystals.
For the chili-lime version, you don’t need fresh lime. Bottled lime juice is pretty good, but fresh zest has a stronger scent that’s hard to replicate. If you don’t have Parmesan, finely grated Pecorino Romano is a saltier, sharper twist that goes well with the herbs. The seasonings themselves are easy to customize. Once you get a handle on the basic roasting technique, you can add just about any dry spice blend to your own favorites list.
A Simple Timeline for Success
Following a loose timeline keeps the process relaxed and helps avoid rushing.
| Time | What Happens |
|---|---|
| 0 minutes | Preheat the oven and prepare the chickpeas. |
| 10 minutes | Chickpeas are rinsed, dried, and coated with oil. |
| 15 minutes | Spread onto the baking sheet and begin roasting. |
| 25 minutes | Shake the pan for even browning. |
| 35 minutes | Check texture and color |
| 40–45 minutes | Most batches finish roasting. |
| 50–55 minutes | Cool completely and add seasonings if needed. |
Having this sequence in mind makes the recipe feel almost effortless after the first attempt.
Keeping Leftovers at Their Best
Roasted chickpeas are one of those foods that reward proper storage. Allow them to cool completely before transferring them to a container. Any lingering warmth creates condensation, which softens the crisp coating. Interestingly, a loosely covered container often works better than a tightly sealed plastic container. Complete airtight storage can trap even tiny amounts of moisture. A glass jar with the lid resting loosely or a paper bag usually preserves the texture more effectively for short-term storage. For the best eating experience, enjoy them within two days. If they’ve lost their crunch, don’t throw them away. Spread them onto a baking sheet and warm them in a 375°F (190°C) oven for about 5 to 8 minutes. They’ll regain much of their original crispness after cooling again.
Is Freezing Worth It?
Unlike many meal-prep recipes, roasted chickpeas don’t freeze particularly well. The freezing and thawing process introduces moisture back into the chickpeas, leaving them noticeably softer than when freshly roasted. If convenience is the goal, it’s usually better to prepare a fresh batch. Since the recipe requires only a few pantry ingredients and about 45 minutes from start to finish, making them fresh generally produces much better results than freezing.
Nutrition Overview
Roasted chickpeas are a healthy source of plant-based protein, fiber, and complex carbs. They get roasted with a little amount of oil so they’re full of taste without being excessively heavy. Nutritional statistics will vary based on the seasoning blend you choose. Savory varieties with Parmesan will add more sodium and protein, and sweet versions with maple syrup will have a bit more sugar naturally. Roasted chickpeas are not a substitute for chips or almonds, but rather their own category of snack: one that’s satisfying, versatile, and easily incorporated into multiple meals during the week.
FAQs
1. What makes my roasted chickpeas not crisp?
The most prevalent explanation is excess moisture before roasting. Rinse chickpeas and pat dry thoroughly. Spread in a single layer and allow sufficient roasting time. They will get even crispier as they cool, so keep that in mind.
2. Do I have to peel all the chickpea skins?
No. Removing the loose skins adds a little texture, but peeling every chickpea isn’t necessary and takes way longer than it’s worth.
3. How do they get soft overnight?
Roasted chickpeas naturally pick up moisture from the air. Keeping them totally cold and warming them for a short time in the oven generally brings back a lot of their crunch.
4. What is the most versatile spice?
The smokey paprika and garlic blend is generally the favorite, because it goes well with soups, salads, grain bowls and sandwiches, but is also a tasty snack on its own.
5. Can I make different tastes at the same time?
Yeah. Roast one large batch of plain chickpeas, then split them into multiple bowls and season each batch with a different spice blend. This is an easy way to mix things up without going through the roasting process again.

Olivia Dawson is a food writer and recipe developer focused on creating clear, practical, and family-friendly cooking content. She specializes in approachable recipes made with everyday ingredients and well-explained methods that support confident cooking. Through Recipes With Olivia, Olivia shares thoughtfully crafted meal ideas designed to be reliable, enjoyable, and easy to recreate in everyday kitchens.