
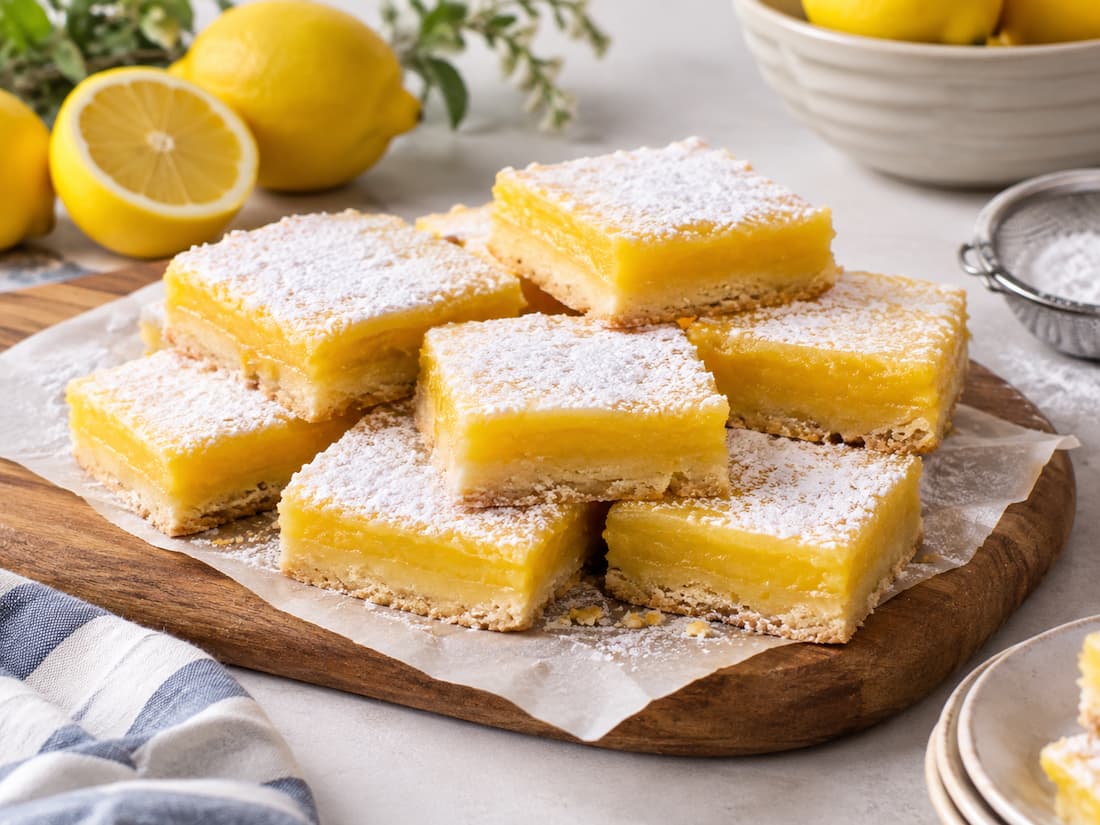
Lemon bars bring together two contrasting textures: a buttery shortbread base that holds its shape and a smooth lemon filling with a bright, sweet-tart flavour. The crust should be firm enough to support each slice without becoming hard, while the filling should set into a tender layer that cuts cleanly rather than running across the plate.
Getting that balance depends on a few important details. Partially baking the crust helps it develop structure, fresh lemon juice provides the main citrus flavour, and the right baking cues help prevent an undercooked centre or a rubbery filling. Allowing the bars to cool completely is equally important because the filling continues to firm as it rests. This recipe uses a standard 8-inch square baking pan and straightforward ingredients. With careful measuring and a little patience during cooling, you can make lemon bars that are neat enough to serve to guests and simple enough to prepare for an everyday treat.
What Makes Lemon Bars Work
Traditional lemon bars have two distinct layers, and each needs a different approach. The shortbread base relies on butter, flour, sugar, and a little salt. Pressing the mixture evenly into the pan creates a solid foundation, while an initial bake helps the flour and butter form a more stable crust. If the base is too thin in some places and thick in others, it will bake unevenly and may crumble when cut.
The lemon filling is a baked mixture of eggs, sugar, lemon juice, lemon zest, and flour. The eggs provide structure as they cook, while the sugar balances the citrus acidity. A small amount of flour helps the filling set without making it excessively firm. The most important balance is between baking the filling long enough to set and removing it before the eggs become overcooked. An underbaked filling may remain loose in the centre, but an overbaked one can become rubbery or develop a slightly grainy texture.
Temperature, pan material, and oven accuracy all affect the result. Treat the recommended baking times as a guide, and use the appearance of the crust and filling to decide when each stage is complete.
Ingredients and Their Roles
For the shortbread crust
- 1 cup (125 g) all-purpose flour: Forms the structure of the base. Spoon the flour into the measuring cup and level it rather than packing it down.
- 1/4 cup (50 g) granulated sugar: Adds sweetness and helps the crust brown lightly.
- 1/4 teaspoon fine salt: Balances the butter and sugar.
- 1/2 cup (113 g) unsalted butter, melted and slightly cooled: Binds the ingredients and gives the crust its buttery flavour.
For the lemon filling
- 1 cup (200 g) granulated sugar: Sweetens the lemon juice and contributes to the filling’s texture.
- 2 tablespoons (16 g) all-purpose flour: Helps the filling hold together after baking.
- 2 large eggs, approximately 100 g without shells: Set the filling as they cook. Use eggs that are not cracked and handle them with clean hands and utensils.
- 1/3 cup (80 ml) freshly squeezed lemon juice: Provides the main tart flavour. The exact amount of juice from each lemon varies, so measure it after squeezing.
- 1 tablespoon finely grated lemon zest: Adds fragrant citrus oils that give the filling a fuller lemon flavour.
- Powdered sugar, optional, for serving: Creates a light decorative finish once the bars are cool.
Fresh lemons are especially useful here because the zest contributes aromatic oils that bottled juice cannot fully replace. Wash and dry the lemons before zesting. Remove only the thin yellow outer layer; the white pith beneath it can add bitterness. For the best consistency, measure the flour and sugar carefully. Too much flour can make the filling dense, while too much juice can leave it softer than intended.
The Complete Step-by-Step Recipe
Step 1: Prepare the pan and oven.
Preheat the oven to 350°F (175°C). Position a rack near the centre so the crust and filling bake evenly.
Line an 8-inch square metal baking pan with parchment paper, leaving some overhang on two opposite sides. This makes it easier to lift the cooled bars out later. Lightly grease the exposed sides of the pan if needed to help the parchment stay in place.
A light-coloured metal pan is a useful choice because it generally heats evenly and is less likely to overbrown the bottom. Dark metal pans may brown the crust faster, while glass pans can behave differently because of their heat retention. Check the bars early if you use a different pan material.
Step 2: Make the shortbread mixture.
In a medium bowl, combine the flour, granulated sugar, and salt. Add the melted butter and stir until the flour is moistened and the mixture resembles damp, coarse crumbs.
The mixture should hold together when squeezed between your fingers but should not look like a smooth bread dough. If dry flour remains at the bottom of the bowl, stir it into the butter rather than adding extra liquid.
Let the butter cool slightly before mixing. Very hot butter can make the mixture unusually greasy and difficult to handle, while the measured quantity of butter should be enough to bind the flour without leaving a pool of fat.
Step 3: Press and partially bake the crust.
Transfer the mixture to the prepared pan. Spread it across the bottom, then press it into an even layer using the back of a spoon, the flat bottom of a measuring cup, or clean fingertips.
Pay attention to the corners and edges, where the crust can become thicker than the centre. An even layer helps the base bake at a consistent rate and makes the finished bars easier to slice.
Bake for 18–22 minutes, checking near the end of the range. The crust should look set and dry on top, with a pale golden colour around the edges. It does not need to become deeply browned because it will return to the oven with the filling.
Remove the pan and set it on a heatproof surface. Prepare the filling while the crust is still warm. There is no need to let the crust cool completely.
Step 4: Mix the lemon filling
In a clean bowl, whisk the granulated sugar and flour together until no large flour clumps remain. Add the eggs and whisk until the mixture looks smooth and evenly combined.
Pour in the measured lemon juice and add the finely grated lemon zest. Whisk gently until everything is incorporated. Avoid beating the mixture excessively, since incorporating unnecessary air can contribute to bubbles on the surface during baking.
If you notice small bubbles, allow the mixture to stand for a minute or gently tap the bowl against the counter. The filling should be fluid and pourable, without visible streaks of egg white or pockets of dry flour.
For the best flavour, zest the lemons before cutting and squeezing them. A fine grater makes it easier to collect the yellow outer peel without scraping the bitter white pith.
Step 5: Add the filling and finish baking.
Pour the lemon mixture evenly over the warm crust. Carefully return the pan to the centre rack.
Bake for approximately 18–25 minutes. Begin checking at around 18 minutes, since ovens and pans vary. The edges should appear set, and the centre should no longer look liquid. When you gently move the pan, the middle may have a slight, unified jiggle, but it should not ripple or slosh like a liquid.
The surface may remain relatively pale. Do not wait for the entire filling to turn golden brown, as that can indicate the eggs have cooked too far. If the edges begin browning heavily while the centre remains loose, check your oven temperature and pan position.
Once the filling reaches the correct consistency, remove the pan from the oven and place it on a cooling rack.
Step 6: Cool before removing the bars.
Leave the bars in the pan until they reach room temperature. The filling will continue to firm as the residual heat dissipates, so avoid cutting into them while they are still warm.
For the cleanest slices, refrigerate the cooled pan for at least 2 hours before cutting. Lift the slab out using the parchment overhang and place it on a cutting board.
Use a sharp knife to cut the slab into 16 squares. Wipe the blade clean between cuts to prevent lemon filling from dragging across the next slice. Finish with a light dusting of powdered sugar immediately before serving.
How to Tell When the Filling Is Done
The filling’s appearance is more useful than the clock alone. Three signs help you judge when the bars are ready.
- The edges are set. The outer portion should look firm rather than wet or glossy. It may pull very slightly away from the parchment or pan, but pronounced shrinking is unnecessary.
- The centre has a gentle, controlled jiggle. A small movement is normal because the hot filling is still soft. The entire centre should move together instead of forming visible waves or a liquid ripple.
- The surface remains mostly pale. Lemon filling does not need a deeply browned top. A few tiny bubbles are generally harmless, but widespread browning or a puffed, uneven surface may indicate excessive heat.
If the centre still looks wet, bake for another 2–3 minutes and check again. Avoid repeatedly opening the oven door, since doing so can cause temperature fluctuations. Do not judge the final firmness while the bars are hot. The egg-based filling becomes more stable as it cools and chills. Removing it when the edges are set and the centre has only a slight jiggle helps preserve a tender texture.
Common Lemon Bar Problems and How to Fix Them
The shortbread crust is greasy.
A greasy base may result from butter that was excessively hot, inaccurate measurements, or a crust that was not baked long enough to set. Measure the butter rather than estimating it, and mix it with the dry ingredients until the crumbs are evenly moistened.
If melted butter pools around the crust before baking, check that the ingredient quantities are correct. The crust should look moist and crumbly, not soaked in liquid fat.
The crust crumbles when sliced
A crumbly crust may contain too much flour, too little butter, or loose patches that were never pressed firmly into the pan. Weighing the flour helps reduce measurement errors. Press the mixture evenly, paying special attention to the corners, and partially bake it until the top looks set.
Allow the finished bars to cool and chill before slicing. Cutting a warm slab can break an otherwise well-made base.
The filling is runny in the center
The most common cause is insufficient baking, although excess lemon juice or inaccurate ingredient measurements can also affect the setting process. Measure the juice rather than relying on the number of lemons.
If the bars have just come out of the oven and the center is visibly liquid, return them to the oven for a few more minutes. If they are already cold and remain runny, refrigeration may firm them somewhat, but it cannot reliably correct a substantially underbaked filling. Do not serve an egg-based filling that appears undercooked.
The filling is too firm or rubbery
Overbaking is a likely cause. Egg proteins become firmer as they cook, so leaving the bars in the oven until the center is completely rigid can produce a tough texture.
Next time, begin checking earlier and remove the pan when the edges are set and the center has only a slight jiggle. Also confirm that the flour has been measured correctly; too much can make the filling unnecessarily dense.
The filling has bubbles or a foamy surface
Vigorous whisking can incorporate air, which may rise to the surface during baking. Mix only until the ingredients are combined, and let the mixture rest briefly before pouring it over the crust.
A few small bubbles are not usually a problem. If presentation matters, gently pop visible surface bubbles with a clean toothpick before baking.
The top browns before the center sets
Your oven may be running hot, or the pan may be positioned too close to the upper heating element. Check the oven temperature with an oven thermometer if this happens regularly.
Bake on the center rack and begin checking at the early end of the suggested range. Avoid turning up the temperature to speed up the process; the filling needs time to set without overcooking at the edges.
Cooling, Chilling, and Slicing
Cooling is part of the recipe, not an optional finishing step. While the bars are hot, the filling remains soft and the crust is more fragile. As the mixture cools, the egg-based structure becomes firmer, allowing the two layers to stay together when cut. First, cool the pan on a rack until the bars reach room temperature. Do not put a hot pan directly into the refrigerator. Once cooled, cover the pan and refrigerate it for at least 2 hours, or until the filling is firm enough to slice neatly.
Use the parchment overhang to lift the chilled slab onto a cutting board. A long, sharp knife works well, but the most important technique is to clean the blade between cuts. If the filling sticks to the knife, wipe it with a damp cloth and dry it before making the next cut. For 16 pieces, cut the slab into four equal rows in each direction. If you prefer larger portions, cut 9 squares instead. Dust with powdered sugar just before serving because moisture from the filling can gradually dissolve the sugar.
Storage and Make-Ahead Advice
Because lemon bars contain eggs and a moist filling, refrigerate them rather than treating them as shelf-stable baked goods. Once cooled, place them in an airtight container and refrigerate at 40°F (4°C) or below. For best quality, enjoy them within 3–4 days. Keep the powdered sugar off until serving so the tops look fresh. If stacking the bars, place parchment between the layers to prevent sticking.
You can make the bars a day ahead. Bake and cool them completely, then cover and refrigerate the uncut slab. Slice and dust with powdered sugar shortly before serving. Chilling the slab overnight can make portioning easier, although the texture will be firmer straight from the refrigerator. For longer storage, freeze the bars without powdered sugar. Arrange the chilled pieces in a single layer until firm, then transfer them to a freezer-safe airtight container with parchment between layers. For the best texture, use them within about 2 months. Thaw them in the refrigerator, and add powdered sugar once they are ready to serve.
Avoid leaving the bars at room temperature for extended periods, particularly in a warm kitchen. Return leftovers to the refrigerator promptly.
A Few Useful Flavor Variations
The classic lemon flavor is the main feature of this recipe, but a few restrained changes can give the bars a different character without altering their basic structure.
- Extra lemon aroma: Increase the zest from 1 tablespoon to 1 tablespoon plus 1 teaspoon, taking care not to grate the white pith.
- Lime-lemon bars: Replace up to half the lemon juice with freshly squeezed lime juice, keeping the total at 1/3 cup (80 ml). The result will taste sharper and more aromatic.
- A hint of vanilla: Add 1/2 teaspoon vanilla extract to the filling. Use a small amount so the citrus remains the dominant flavor.
- A lightly toasted coconut finish: Sprinkle a little unsweetened toasted coconut over the powdered sugar immediately before serving. Keep the topping light so it does not overwhelm the lemon.
For the first batch, follow the recipe as written. Once you understand the texture of the crust and the filling, small flavor adjustments are easier to evaluate.
Serving Suggestions
Lemon bars are rich enough to serve in small portions, making them suitable for afternoon tea, family gatherings, picnics with proper refrigeration, or a simple dessert after dinner. Serve them chilled for the neatest slices, or allow individual portions to sit out briefly before serving if you prefer a softer filling. A light dusting of powdered sugar gives them a classic finish without adding much sweetness.
For a dessert plate, pair a bar with fresh berries or a few thin slices of strawberry. Their mild sweetness complements the lemon’s tartness. Keep garnishes simple and add them just before serving so the shortbread stays crisp and the presentation remains tidy.
FAQs
1. Can I use bottled lemon juice?
Freshly squeezed juice is preferable for its brighter flavor, especially when paired with fresh zest. Bottled juice can work if necessary, but the taste may be less fragrant. Measure exactly 1/3 cup (80 ml).
2. Why is my lemon filling still soft after baking?
The bars may need more baking time, or they may not have cooled long enough. Check that the center is not liquid when the pan is gently moved, then allow the bars to cool and chill fully. If the center remains substantially undercooked, refrigeration alone is not a reliable fix.
3. Can I make lemon bars without parchment paper?
Yes. Grease the pan thoroughly, paying attention to the corners, but expect removal to be more difficult. Parchment makes it easier to lift the entire slab out without breaking the crust.
4. Can I cut lemon bars while they are warm?
You can, but the filling and crust are more likely to separate or smear. For clean, defined edges, cool the bars completely and chill them for at least 2 hours before slicing.
5. Do lemon bars need to be refrigerated?
Yes. Their moist, egg-based filling means they should be refrigerated after cooling. Store them in an airtight container at 40°F (4°C) or below.
Recipe Card: Lemon Bars With a Firm Shortbread Base and a Smooth, Tangy Filling
Yield: 16 bars
Serving size: 1 bar
Prep time: 20 minutes
Crust baking time: 18–22 minutes
Filling baking time: 18–25 minutes
Cooling and chilling time: About 3 hours or longer
Total estimated time: Approximately 4 hours, including cooling and chilling
Pan size: 8-inch square metal baking pan
Oven temperature: 350°F (175°C)
Ingredients
For the shortbread crust
- 1 cup (125 g) all-purpose flour
- 1/4 cup (50 g) granulated sugar
- 1/4 teaspoon fine salt
- 1/2 cup (113 g) unsalted butter, melted and slightly cooled
For the lemon filling
- 1 cup (200 g) granulated sugar
- 2 tablespoons (16 g) all-purpose flour
- 2 large eggs
- 1/3 cup (80 ml) freshly squeezed lemon juice
- 1 tablespoon finely grated lemon zest
For serving
- Powdered sugar, as needed
Instructions
- Preheat the oven to 350°F (175°C). Line an 8-inch square metal baking pan with parchment paper, leaving an overhang on two opposite sides. Lightly grease the exposed sides if needed.
- Combine the flour, sugar, and salt for the crust in a medium bowl. Add the melted, slightly cooled butter and stir until the mixture resembles damp crumbs.
- Transfer the mixture to the pan and press it into an even layer, including the corners.
- Bake for 18–22 minutes, until the crust looks set and dry on top, with lightly golden edges. Remove from the oven.
- For the filling, whisk the sugar and flour together in a clean bowl. Add the eggs and whisk until smooth.
- Add the lemon juice and zest. Whisk gently until combined, avoiding excessive aeration.
- Pour the filling over the warm crust and return the pan to the oven.
- Bake for 18–25 minutes, until the edges are set and the center has only a slight jiggle when the pan is gently moved. The center should not look liquid.
- Place the pan on a cooling rack and let the bars cool completely at room temperature.
- Cover and refrigerate for at least 2 hours. Lift the slab out using the parchment overhang and cut into 16 squares with a sharp knife, wiping the blade between cuts.
- Dust with powdered sugar immediately before serving.
Recipe Notes
- Use a light-colored metal pan for more predictable browning.
- Measure flour and lemon juice accurately to help maintain the intended texture.
- Do not wait for the filling to become completely firm in the oven; it will continue to set as it cools.
- Refrigerate leftovers in an airtight container at 40°F (4°C) or below and enjoy within 3–4 days.
- For a make-ahead dessert, bake the bars a day before serving, chill them in the pan, and add powdered sugar just before presentation.

Olivia Dawson is a food writer and recipe developer focused on creating clear, practical, and family-friendly cooking content. She specializes in approachable recipes made with everyday ingredients and well-explained methods that support confident cooking. Through Recipes With Olivia, Olivia shares thoughtfully crafted meal ideas designed to be reliable, enjoyable, and easy to recreate in everyday kitchens.