
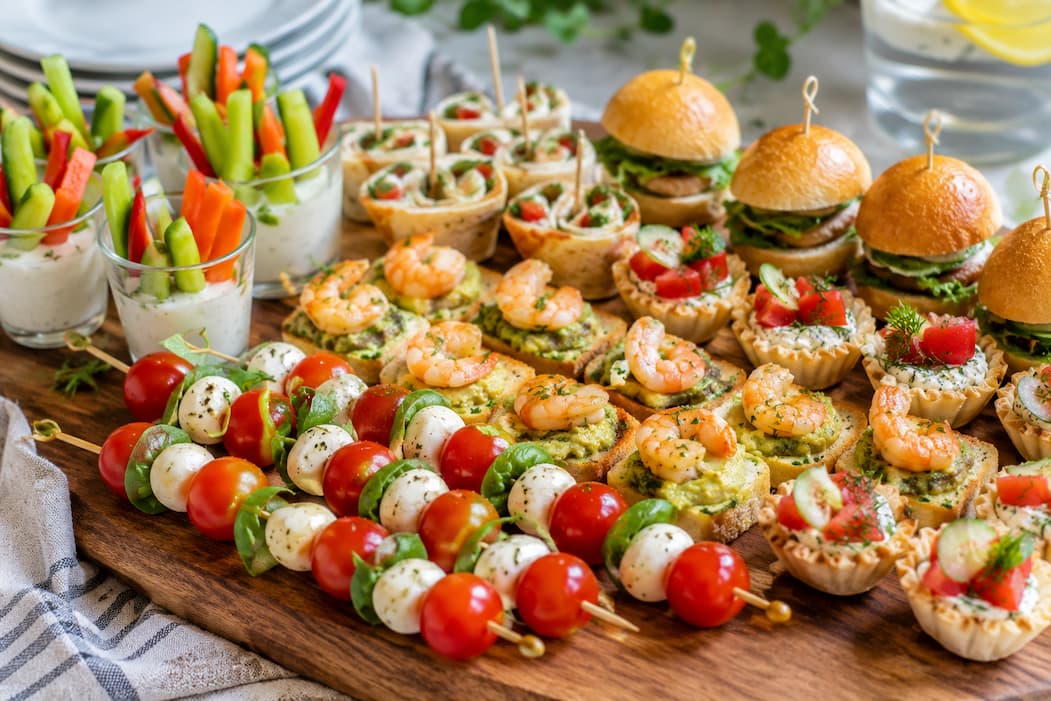
By the end of the night, three people had asked for the Caprese skewer recipe, someone had snapped a photo of the mini chicken tacos for their Instagram story, and my friend Marcus—who claims he “doesn’t eat vegetables”—had eaten six of the spinach phyllo cups without realizing there was spinach inside. That night taught me something powerful: you don’t need to be a professional caterer to throw a memorable party. You just need a handful of reliable, crowd-pleasing recipes that look impressive but come together without breaking a sweat.
These five finger foods are exactly what I served that night, refined over dozens of gatherings since. They’re beginner-friendly, make-ahead-friendly, and guaranteed to make you look like the hostess who has it all together—even if you’re still finding confetti in your couch cushions from the last party.
5 Complete Finger Food Recipes
1. Caprese Skewers with Balsamic Glaze
These are the definition of effortless elegance. Juicy cherry tomatoes, creamy fresh mozzarella, and fragrant basil leaves threaded onto small skewers, finished with a drizzle of sweet-tart balsamic glaze. They look like you hired a caterer, but they take less time than ordering one.
- 24 cherry tomatoes
- 24 small fresh mozzarella balls (ciliegine, about ½ inch)
- 24 fresh basil leaves
- ¼ cup balsamic glaze (store-bought or homemade)
- 2 tablespoons extra virgin olive oil
- Flaky sea salt, for finishing
- 24 small bamboo skewers or cocktail picks
- Wash and dry the cherry tomatoes thoroughly. Wet tomatoes will make the skewers slippery and unappealing.
- If your mozzarella balls are packed in water, drain them well and pat dry with paper towels.
- Thread one cherry tomato, one folded basil leaf, and one mozzarella ball onto each skewer. I like to fold the basil leaf in half so it stays put and looks fuller on the skewer.
- Arrange the completed skewers on a serving platter. Drizzle generously with balsamic glaze and olive oil.
- Finish with a light sprinkle of flaky sea salt right before serving. The salt makes the tomatoes taste like tomatoes should.
2. Mini Chicken Tacos with Avocado Crema
These little two-bite tacos are always the first thing to disappear at my parties. I use street taco-sized corn tortillas—they’re the perfect handheld size—and top them with a creamy avocado sauce that balances the spiced chicken beautifully. They’re warm, satisfying, and feel festive without being fussy.
- 1 lb ground chicken
- 1 tablespoon olive oil
- 2 teaspoons chili powder
- 1 teaspoon ground cumin
- ½ teaspoon garlic powder
- ½ teaspoon onion powder
- ½ teaspoon salt
- ¼ teaspoon black pepper
- 2 tablespoons water
- 1 ripe avocado
- ½ cup sour cream
- 1 tablespoon lime juice
- ¼ teaspoon salt
- 1 tablespoon water (to thin, if needed)
- 18 street taco-sized corn tortillas (I like Mission Street Tacos or Guerrero)
- ½ cup shredded cabbage or lettuce
- ¼ cup fresh cilantro, chopped
- Lime wedges, for serving
- Heat the olive oil in a large skillet over medium-high heat. Add the ground chicken and cook, breaking it up with a wooden spoon, until no pink remains—about 5 to 6 minutes.
- Stir in the chili powder, cumin, garlic powder, onion powder, salt, pepper, and 2 tablespoons water. Cook for another 2 minutes until the spices are fragrant and the chicken is well coated. Reduce heat to low and keep warm.
- While the chicken cooks, make the avocado crema. Scoop the avocado flesh into a blender or food processor. Add the sour cream, lime juice, salt, and water. Blend until completely smooth and creamy. Transfer to a squeeze bottle or small bowl.
- Warm the tortillas. You can do this quickly by wrapping them in a damp paper towel and microwaving for 30 seconds, or by heating them directly over a gas flame for 10 seconds per side for a little char.
- To assemble each mini taco, place a spoonful of seasoned chicken on a warm tortilla. Top with a pinch of shredded cabbage, a drizzle of avocado crema, and a sprinkle of fresh cilantro.
- Arrange on a platter and serve with lime wedges on the side. Guests can squeeze fresh lime over their tacos right before eating.
3. Smoked Salmon Cucumber Bites with Dill Cream Cheese
These are my secret weapon when I want to serve something that feels upscale without any actual cooking. Crisp cucumber rounds become the perfect edible base for silky smoked salmon and herbed cream cheese. They’re refreshing and elegant and always make guests feel a little fancy—like they should be holding a champagne flute even if it’s just sparkling water.
- 2 English cucumbers
- 8 oz cream cheese, softened
- 2 tablespoons fresh dill, finely chopped
- 1 tablespoon lemon juice
- ¼ teaspoon garlic powder
- ¼ teaspoon salt
- 6 oz smoked salmon, sliced into bite-sized pieces
- Fresh cracked black pepper
- Extra dill sprigs, for garnish
- Wash the cucumbers and slice them into ½-inch thick rounds. You want them thick enough to hold the toppings but thin enough to eat in one bite. Aim for about 20 rounds total.
- In a small bowl, beat the softened cream cheese with a fork until smooth and fluffy. Stir in the chopped dill, lemon juice, garlic powder, and salt until well combined.
- Spread about 1 teaspoon of the dill cream cheese onto each cucumber round. Don’t be stingy — the cream cheese is what holds everything together and adds richness.
- Top each round with a small piece of smoked salmon, folding or curling it slightly so it looks pretty rather than just laying it flat.
- Finish each bite with a crack of fresh black pepper and a tiny dill sprig for garnish. The visual appeal is half the experience here.
- Arrange on a chilled platter and serve immediately, or refrigerate covered for up to 2 hours before serving.
4. Spinach and Feta Phyllo Cups
These little cups are my most-requested party recipe, and I completely understand why. Buttery, flaky phyllo pastry cradles a creamy spinach and feta filling that’s savory, rich, and impossibly addictive. They’re the kind of bite that makes people hover near the platter, “just grabbing one more.” For phyllo cups, I reach for Athens Mini Fillo Shells—they’re consistently crisp, hold their shape beautifully, and save you from wrestling with sheets of phyllo dough. You’ll find them in the freezer section near the pie crusts.
- 2 boxes (15 count each) Athens Mini Fillo Shells, thawed
- 1 tablespoon olive oil
- 1 small onion, finely diced
- 2 cloves garlic, minced
- 5 oz fresh baby spinach, roughly chopped
- 4 oz feta cheese, crumbled
- ¼ cup ricotta cheese
- 1 large egg, beaten
- ¼ teaspoon nutmeg
- ½ teaspoon salt
- ¼ teaspoon black pepper
- 1 tablespoon fresh dill, chopped (optional)
- Preheat your oven to 350°F (175°C). Arrange the thawed phyllo cups on a baking sheet, still in their tray if they came in one. If not, place them snugly together on a parchment-lined sheet so they don’t tip over.
- Heat the olive oil in a skillet over medium heat. Add the diced onion and cook for 3 to 4 minutes until soft and translucent. Add the minced garlic and cook for 30 seconds more, until fragrant.
- Add the chopped spinach in batches, stirring until it wilts down. This happens quickly — about 2 minutes total. Remove from heat and let cool for 5 minutes.
- In a medium bowl, combine the crumbled feta, ricotta, beaten egg, nutmeg, salt, pepper, and fresh dill if using. Stir in the cooled spinach mixture until everything is evenly distributed.
- Spoon about 1 heaping teaspoon of the spinach-feta mixture into each phyllo cup. Don’t overfill — the filling will puff slightly as it bakes.
- Bake for 12 to 15 minutes, until the filling is set and the phyllo cups are golden and crisp at the edges.
- Let cool for 5 minutes before transferring to a serving platter. They’re best warm but delicious at room temperature too.
5. Fruit and Cheese Skewers with Honey Drizzle
Every party needs something sweet, and these skewers are my answer to the dessert course without being overly indulgent. They’re colorful and refreshing, and the combination of juicy fruit, creamy cheese, and golden honey feels luxurious without any baking required. I love how they double as a palate cleanser between the savory bites.
- 16 fresh strawberries, hulled
- 16 green grapes
- 16 cubes of sharp cheddar cheese (about ½ inch each)
- 8 oz brie cheese, cut into 16 small wedges
- 2 tablespoons honey
- Fresh mint leaves, for garnish
- 16 small bamboo skewers or cocktail picks
- Wash and thoroughly dry all the fruit. Pat the strawberries and grapes with paper towels — any moisture will make the cheese slippery on the skewers.
- Cut the brie into small wedges, about 1 inch wide at the base. Keep the rind on — it adds texture and helps the cheese hold its shape on the skewer.
- Thread one grape, one strawberry, one cheddar cube, and one brie wedge onto each skewer. I like to alternate the colors so each skewer looks like a little rainbow.
- Arrange the completed skewers on a serving platter. Drizzle lightly with honey—a little goes a long way here.
- Garnish the platter with fresh mint leaves for a pop of green and a hint of freshness. Serve immediately or refrigerate for up to 1 hour.
Serving & Presentation Tips
Here’s the truth nobody tells you: how you serve finger foods matters almost as much as how they taste. A beautiful platter turns good food into an experience. Here are my tried-and-true tricks for making everything look and taste its best from the first guest to the last.
Keep Hot Foods Hot
Serve the Mini Chicken Tacos and Spinach Phyllo Cups on a warmed platter or in a chafing dish. If you don’t have one, a slow cooker set to “warm” works beautifully for the taco filling.
Keep Cold Foods Cold
Nestle the Caprese skewers and salmon cucumber bites on a bed of crushed ice or a chilled platter. I keep a platter in the freezer for 30 minutes before loading it up.
Build Visual Height
Use cake stands, overturned bowls, or stacked cutting boards to create different levels on your table. It makes even simple food look abundant and inviting.
Garnish Everything
A sprinkle of fresh herbs, a drizzle of good olive oil, or a few edible flowers transforms a platter from “homemade” to “intentionally styled.” Don’t skip this step.
My final piece of advice: set out small plates and napkins near the food, not across the room. People are more likely to try everything when the logistics are easy. And leave a little space between items on the platter—crowding makes food look messy and unappealing, while breathing room signals “this is special; take your time.”
You’ve Got This
Throwing a party doesn’t require culinary school or a catering budget. It requires a little planning, a handful of reliable recipes, and the willingness to open your door and let people in. These five finger foods have carried me through baby showers, birthday parties, holiday gatherings, and quiet dinners with friends—and they’ve never let me down.
Start with just one or two recipes for your first gathering. Build from there. Before you know it, you’ll be the friend everyone asks for party advice. And when they do, pass it on. Good food is meant to be shared.

Olivia Dawson is a food writer and recipe developer focused on creating clear, practical, and family-friendly cooking content. She specializes in approachable recipes made with everyday ingredients and well-explained methods that support confident cooking. Through Recipes With Olivia, Olivia shares thoughtfully crafted meal ideas designed to be reliable, enjoyable, and easy to recreate in everyday kitchens.