
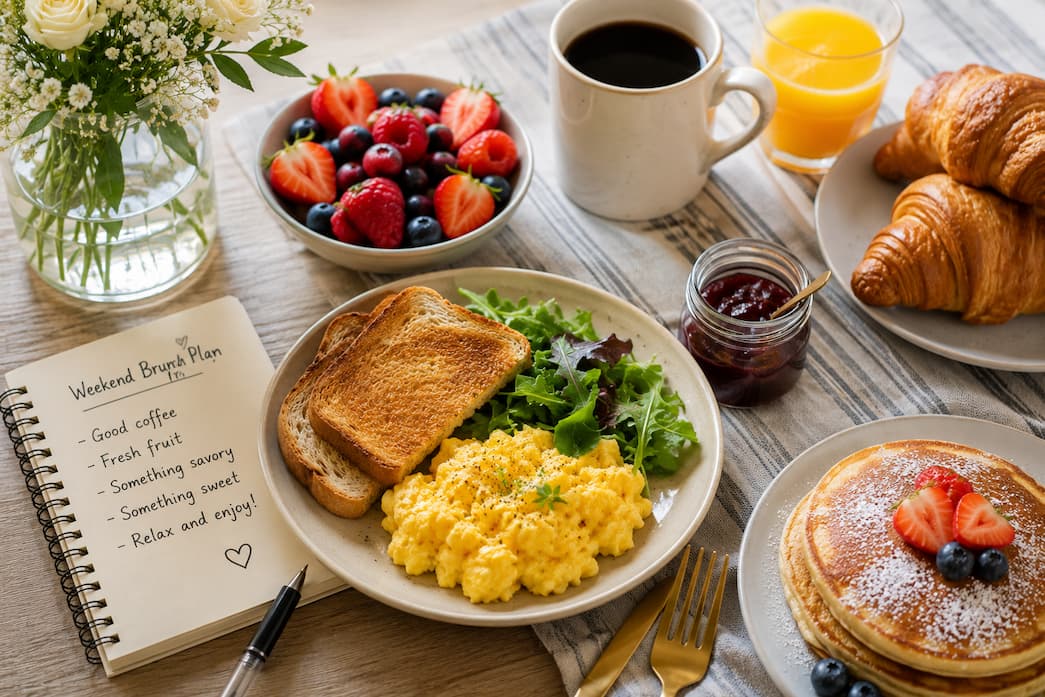
That morning taught me something I wish I’d learned sooner: the best brunch isn’t the one with the longest wait or the most Instagram-worthy plating. It’s the one that happens in your own space, at your own pace, surrounded by people you actually want to spend a slow morning with. Since then, I’ve hosted dozens of weekend brunches—some for four people, some for twelve, some planned a week ahead, and some thrown together the night before. And I’ve developed a menu that works every single time: four dishes that complement each other, can be partially made ahead, and leave me actually enjoying my guests instead of sweating over a stove.
I’m going to walk you through exactly what I make, when I start each piece, and how I pull it all together without losing my mind. Pour yourself a cup of coffee and settle in. This is going to be good.
Your Sunday Morning Timeline
Here’s the secret to a relaxed brunch: everything doesn’t happen at once. I’ve mapped out exactly when to start each component so that by the time your guests arrive, you’re putting the finishing touches on scrambled eggs instead of frantically chopping herbs. If you’re making the French toast bake the night before (which I highly recommend), your morning becomes even calmer.
The Complete Brunch Menu
1. Fluffy Scrambled Eggs with Chives and Goat Cheese
These are not your average scrambled eggs. They’re soft and custardy, with little pockets of tangy goat cheese that melt into warm, creamy ribbons. The chives add a gentle oniony freshness that makes them taste like spring, even in the dead of winter. I make these right before we sit down—they’re the one thing that truly needs to be last-minute, and they take less than ten minutes from fridge to plate.
- 10 large eggs
- 3 tablespoons whole milk or half-and-half
- ½ teaspoon salt
- ¼ teaspoon black pepper
- 2 tablespoons unsalted butter
- 3 oz soft goat cheese (chèvre), crumbled
- 3 tablespoons fresh chives, finely chopped
- Crack the eggs into a large bowl. Add the milk, salt, and pepper. Whisk vigorously for about 30 seconds until the mixture is completely uniform and slightly frothy. This aeration is what makes them fluffy — don’t skip it.
- Heat a large non-stick skillet over medium-low heat. Add the butter and let it melt slowly, swirling the pan to coat the bottom evenly. You want the butter foamy but not browned.
- Pour in the egg mixture. Let it sit undisturbed for about 20 seconds, until you see the edges just beginning to set.
- Using a silicone spatula, gently push the eggs from the edges toward the center, forming large, soft curds. Don’t stir constantly — let the eggs set slightly between each push. This should take about 4 to 5 minutes.
- When the eggs are mostly set but still look slightly wet and glossy, remove the pan from the heat. The residual heat will finish cooking them.
- Immediately sprinkle the crumbled goat cheese and chopped chives over the top. Gently fold them in with your spatula—you want pockets of cheese, not a homogeneous mixture.
- Transfer to a warm serving dish and serve immediately. These wait for no one.
Make-Ahead Note: Honestly? These don’t hold well. But you can crack and whisk the eggs with the milk, salt, and pepper the night before and store them covered in the fridge. In the morning, just give them a quick whisk and proceed. The chives can be chopped ahead too — store them in a damp paper towel in the fridge to keep them fresh.
2. Crispy Roasted Potatoes with Rosemary
These potatoes are the unsung heroes of my brunch table. They’re golden and crackly on the outside and creamy and tender inside, and they fill the kitchen with the most intoxicating aroma of rosemary and olive oil. I make them for almost every gathering because they’re universally loved, they don’t require any attention once they’re in the oven, and they somehow taste even better at room temperature than they do hot.
- 2 lbs baby Yukon Gold potatoes, halved (quartered if large)
- 3 tablespoons olive oil
- 1 tablespoon fresh rosemary leaves, finely chopped
- 3 cloves garlic, minced
- 1 teaspoon salt
- ½ teaspoon black pepper
- Flaky sea salt, for finishing
- Preheat your oven to 425°F (220°C). Place a large rimmed baking sheet in the oven while it preheats—this is the secret to extra-crispy potatoes. A hot pan sears the cut side immediately.
- Wash and dry the potatoes thoroughly. Cut them into roughly 1-inch pieces, halving the small ones and quartering anything larger. Uniform size means uniform cooking.
- In a large bowl, toss the potato pieces with olive oil, chopped rosemary, minced garlic, salt, and pepper. Make sure every piece is well coated.
- Carefully remove the hot baking sheet from the oven. Spread the potatoes in a single layer, cut-side down where possible. The cut side against the hot pan is what creates that golden crust.
- Roast for 20 to 25 minutes, without stirring, until the bottoms are deeply golden and crisp. The tops will be tender and the edges slightly charred.
- Remove from the oven and let cool for 2 minutes on the pan—this helps the crust set so it doesn’t stick. Transfer to a serving dish and finish with a sprinkle of flaky sea salt.
Make-Ahead Note These reheat beautifully, which makes them perfect for brunch. Roast them fully the night before, let them cool completely, and store in an airtight container in the fridge. In the morning, spread them on a baking sheet and reheat at 400°F for 10 to 12 minutes. They’ll be just as crispy as the first time. You can also parboil the potatoes for 5 minutes the night before, toss them with seasonings, and refrigerate them raw—then roast them fresh in the morning for maximum crispness.
3. Mixed Berry French Toast Bake
This is the dish that makes people think you woke up at dawn. In reality, you threw it together the night before while watching Netflix. It’s essentially bread pudding masquerading as French toast—custardy in the center, slightly crisp on top, studded with berries that burst into jammy pockets as it bakes. I use a mix of strawberries, blueberries, and raspberries, but use whatever looks good at the market. The beauty of this recipe is that it does all the work while you sleep.
- 1 loaf challah or brioche bread, cut into 1-inch cubes (about 8 cups)
- 6 large eggs
- 2 cups whole milk
- ½ cup heavy cream
- ⅓ cup maple syrup, plus more for serving
- 2 teaspoons vanilla extract
- 1 teaspoon ground cinnamon
- ½ teaspoon salt
- 1½ cups mixed fresh berries (strawberries, blueberries, raspberries)
- 2 tablespoons unsalted butter, cut into small pieces
- Powdered sugar, for dusting
- Grease a 9×13-inch baking dish with butter or cooking spray. Spread the bread cubes evenly across the bottom. It’s okay if they overlap slightly—you want a full, even layer.
- In a large bowl, whisk together the eggs, milk, heavy cream, maple syrup, vanilla extract, cinnamon, and salt. Whisk until completely smooth and the cinnamon is fully incorporated.
- Pour the custard mixture evenly over the bread cubes. Press down gently with a spatula to make sure every piece gets soaked. Scatter the mixed berries over the top, pressing some into the custard and leaving some on the surface.
- Dot the surface with the small butter pieces. These will melt into the top and create golden, slightly crispy edges.
- Cover tightly with plastic wrap and refrigerate overnight, or for at least 4 hours. This soaking time is nonnegotiable—it’s what transforms dry bread into custardy perfection.
- When you’re ready to bake, remove the dish from the refrigerator and let it sit at room temperature for 15 minutes while you preheat the oven to 350°F (175°C).
- Bake uncovered for 35 to 40 minutes, until the center is set and the top is puffed and golden brown. A knife inserted in the center should come out clean.
- Let cool for 5 minutes, then dust with powdered sugar and serve warm with extra maple syrup on the side.
Make-Ahead Note This is the ultimate make-ahead dish. Assemble it completely the night before, cover, and refrigerate. In the morning, just pull it out, let it rest for 15 minutes, and bake. It also reheats well — cover with foil and warm at 325°F for 15 minutes if you need to hold it. I’ve even made it two nights ahead with excellent results. The flavors actually deepen as it sits.
4. Fresh Orange and Mint Salad
Every brunch needs something bright and refreshing to cut through the richness of eggs and potatoes. This orange salad is that palate cleanser—juicy citrus segments tossed with fresh mint and a whisper of honey, finished with a pinch of flaky salt that makes the sweetness sing. It’s the kind of dish that sounds almost too simple until you taste it and realize that simple is exactly what you needed. I make this first thing in the morning and let it sit at room temperature so the flavors meld gently.
- 4 large navel oranges
- 1 tablespoon honey
- 1 tablespoon fresh orange juice (from the segmented oranges)
- ¼ cup fresh mint leaves, torn into small pieces
- Pinch of flaky sea salt
- Optional: 1 tablespoon pistachios, roughly chopped, for crunch
- Cut a thin slice off the top and bottom of each orange so they sit flat on your cutting board. Stand an orange upright and carefully slice away the peel and white pith, following the curve of the fruit from top to bottom. Repeat with all four oranges.
- Working over a bowl to catch the juice, use a sharp knife to cut between the membranes and release the orange segments. This is called “supreming,” and it’s easier than it sounds—just slide your knife along each side of the membrane, and the segment pops right out.
- Squeeze the remaining membrane over the bowl to extract any extra juice. You’ll need about 1 tablespoon for the dressing.
- In a small bowl, whisk the honey with the reserved orange juice until the honey dissolves completely.
- Gently toss the orange segments with the torn mint leaves and the honey-orange dressing. Be careful—orange segments are delicate, and you don’t want them to break apart.
- Transfer to a shallow serving bowl, sprinkle with flaky sea salt, and top with chopped pistachios if using. Serve at room temperature for the best flavor.
Make-Ahead Note You can segment the oranges and make the honey-orange dressing the night before, storing them separately in the refrigerator. In the morning, drain any accumulated juice from the oranges, toss with the dressing and fresh mint, and let sit at room temperature for 15 minutes before serving. The mint is best torn fresh — it bruises and darkens if chopped too far ahead.
Brunch Hosting Tips
After hosting more brunches than I can count, I’ve learned that the food is only half the equation. The other half is creating an atmosphere where people feel welcome, comfortable, and genuinely glad they came. Here are the little things that make a big difference.
Set the Table the Night Before
Plates, napkins, utensils, water glasses, coffee mugs—lay it all out after dinner on Saturday. Sunday morning you should be focused on food, not hunting for the salad forks.
Keep Food Warm Without Stress
A 200°F oven is your best friend. The French toast bake and potatoes can rest covered with foil while you make the eggs. Warm plates in the oven for 5 minutes before serving.
Accommodate Dietary Needs Gracefully
This menu is naturally vegetarian. For dairy-free guests, skip the goat cheese on their portion of eggs and use oat milk in the French toast. For gluten-free, substitute a GF bread in the bake. Always ask ahead—a simple “Anything I should know?” text goes a long way.
One more thing: don’t apologize for anything. If the eggs are slightly overcooked or the potatoes take longer than expected, your guests don’t know and they don’t care. They’re there for the company, the coffee, and the feeling of being welcomed into your home. The food is just the excuse.
Your Complete Shopping List
Here’s everything you need, organized by grocery store section so you can get in and out efficiently. I always shop on Saturday morning—fresher ingredients, and it gives me Saturday afternoon to prep anything that needs it.
Produce
- 2 lbs baby Yukon Gold potatoes
- 4 large navel oranges
- 1½ cups mixed fresh berries (strawberries, blueberries, raspberries)
- Fresh rosemary (1 small bunch)
- Fresh chives (1 small bunch)
- Fresh mint (1 small bunch)
- 3 cloves garlic
Dairy & Eggs
- 16 large eggs
- 3 oz soft goat cheese (chèvre)
- 2 cups whole milk
- ½ cup heavy cream
- 3 tablespoons unsalted butter
- 2 tablespoons unsalted butter (for French toast bake)
Bakery
- 1 loaf challah or brioche bread
Pantry & Beverages
- Olive oil
- Maple syrup
- Vanilla extract
- Ground cinnamon
- Salt and black pepper
- Flaky sea salt
- Honey
- 1 bottle prosecco or cava
- Sparkling water or lemon-lime soda (non-alcoholic option)
- Orange juice (or oranges to squeeze fresh)
- Optional: mango nectar, pomegranate juice
Optional Garnishes
- Powdered sugar
- Pistachios
- Extra berries for mimosa bar
Sunday Mornings Are Worth Protecting
There’s a particular kind of magic that happens when you slow down, pour good coffee into real mugs, and share a meal with people you love in the space where you actually live. No reservations. No time limits. No markup on eggs.
This menu is designed to give you that magic without the stress. Make what you can ahead. Follow the timeline. Set the table the night before. And then—this is the important part—sit down. Eat the food you made. Listen to your friends laugh. Refill your own coffee cup. Let the morning stretch out the way Sunday mornings are meant to.
The best brunch isn’t the one at the fanciest restaurant. It’s the one where you feel completely, unhurriedly at home.

Olivia Dawson is a food writer and recipe developer focused on creating clear, practical, and family-friendly cooking content. She specializes in approachable recipes made with everyday ingredients and well-explained methods that support confident cooking. Through Recipes With Olivia, Olivia shares thoughtfully crafted meal ideas designed to be reliable, enjoyable, and easy to recreate in everyday kitchens.