
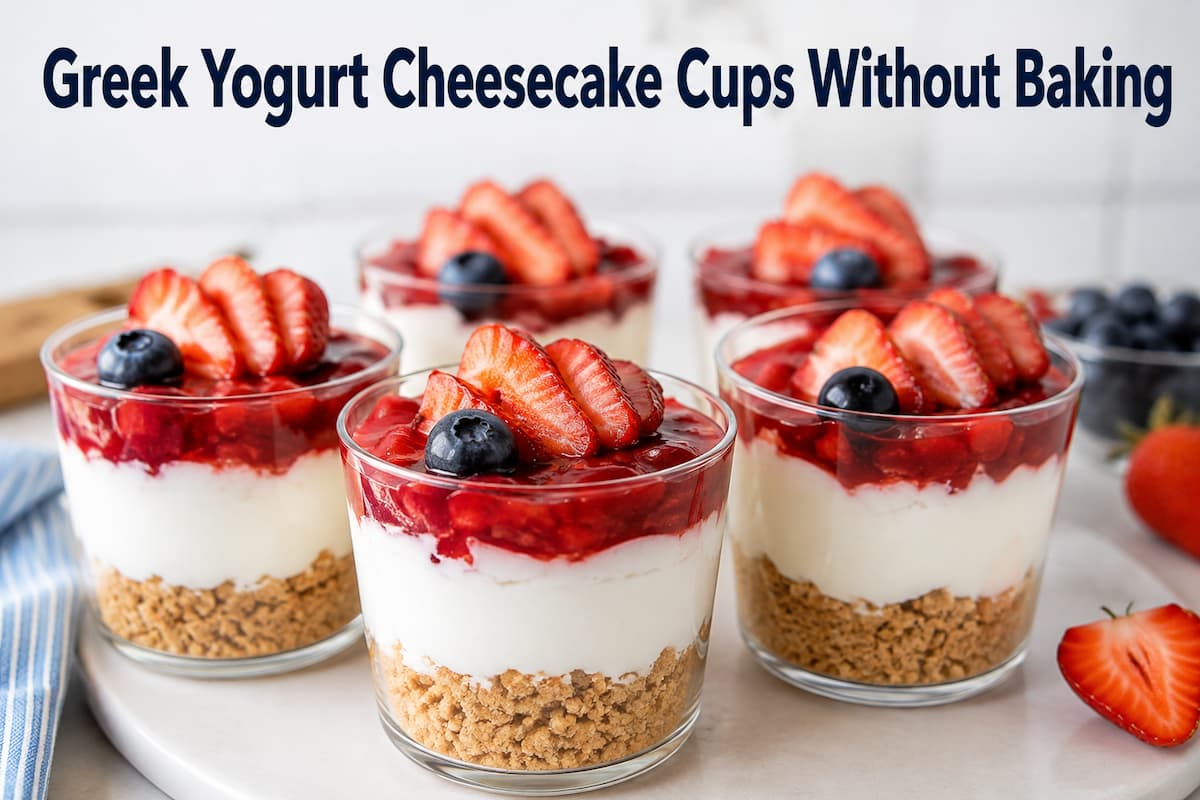
Some desserts feel like they belong only to special occasions, but these no-bake Greek yogurt cheesecake cups are the kind you’ll find yourself making on an ordinary Tuesday. They come together with simple ingredients, require no oven time, and chill into a creamy dessert that’s light enough for an afternoon treat yet satisfying enough to serve after dinner.
The combination of cream cheese and Greek yogurt creates a filling that’s smooth and tangy without feeling overly rich. Unlike traditional baked cheesecake, there’s no worrying about water baths, cracked tops, or precise baking times. A little patience in the refrigerator is all it takes for these individual cheesecake cups to set beautifully. They’re also easy to prepare ahead of time. Since each serving is already portioned into its own cup or jar, they’re perfect for entertaining, meal prep, or simply having a homemade dessert waiting in the fridge.
Why These Cheesecake Cups Turn Out So Well
Greek yogurt adds brightness to the filling while keeping it creamy. It balances the richness of the cream cheese instead of competing with it, giving each bite a fresh, clean flavor. The filling doesn’t rely on gelatin or complicated stabilizers. Simply beating the ingredients until smooth and allowing enough chilling time creates a texture that’s soft yet firm enough to hold its shape when spooned. Another advantage is flexibility. You can finish the cups with berries, chocolate, fruit compote, crushed cookies, or toasted nuts without changing the base recipe.
Ingredients
For the Crust
- 1 cup graham cracker crumbs
- 3 tablespoons melted butter
- 1 tablespoon granulated sugar (optional)
For the Filling
- 8 ounces (225 g) cream cheese, softened
- 1 cup plain Greek yogurt
- ⅓ cup powdered sugar
- 1 teaspoon vanilla extract
- 1 tablespoon lemon juice
Optional Toppings
- Fresh strawberries
- Blueberries
- Raspberries
- Cherry or blueberry compote
- Honey
- Lemon zest
- Crushed pistachios
- Toasted almonds
- Dark chocolate shavings
- Crushed digestive biscuits
Choosing the Right Greek Yogurt
Not all Greek yogurt behaves the same way in cheesecake filling.
| Type | Result |
|---|---|
| Full-fat Greek yogurt | Creamiest texture |
| Low-fat Greek yogurt | Slightly lighter consistency |
| Non-fat Greek yogurt | Firmer texture with more tanginess |
A thick Greek yogurt works best because it contains less excess moisture. If your yogurt seems thin, letting it drain in a fine sieve for 20–30 minutes helps produce a richer filling.
Before You Begin
Allow the cream cheese to reach room temperature before mixing. Cold cream cheese often leaves small lumps that are difficult to remove later. Softened cream cheese blends quickly with the yogurt, creating a silky filling without excessive mixing. Using chilled serving glasses or jars is another small detail that helps the dessert stay cool while assembling.
Step-by-Step Instructions
1. Prepare the Crust
Combine the graham cracker crumbs, melted butter, and sugar in a bowl until the mixture resembles damp sand. Divide the crumbs evenly among serving cups and gently press them down using the back of a spoon. Place the cups in the refrigerator while preparing the filling.
2. Make the Cheesecake Filling
Beat the softened cream cheese until completely smooth. Add the Greek yogurt, powdered sugar, vanilla extract, and lemon juice. Mix just until everything becomes creamy and evenly combined. Avoid overmixing, which can make the filling looser than necessary.
3. Fill the Cups
Spoon or pipe the cheesecake mixture over the chilled crusts. Smooth the tops with a spoon or small offset spatula.
4. Chill
Cover the cups and refrigerate for at least four hours. For the best texture, chill overnight. Add toppings immediately before serving.
The Texture Changes as It Chills
Freshly mixed filling is soft and airy. After several hours in the refrigerator, you’ll notice it becomes noticeably firmer while still remaining creamy. The flavors also improve with time as the vanilla and lemon blend into the yogurt and cream cheese. If served too early, the filling may seem loose. An overnight chill produces the most balanced texture.
Flavor Ideas Beyond Fresh Berries
These cheesecake cups are easy to adapt throughout the year. Fresh peaches and toasted almonds make a wonderful summer version. Apple compote with a sprinkle of cinnamon feels perfect in cooler months. Chocolate lovers can top each cup with shaved dark chocolate and a drizzle of chocolate sauce. For something brighter, lemon curd paired with blueberries creates a refreshing finish. Even a simple drizzle of honey and chopped walnuts works beautifully when you want a less sweet dessert.
A Few Helpful Observations
If the filling seems slightly grainy, the cream cheese was probably still too cold. Should the crust feel loose, adding another teaspoon of melted butter usually solves the problem. When using fruit toppings, pat washed berries dry before placing them on the cheesecake. Excess moisture can slowly seep into the filling if the cups are stored overnight. Powdered sugar blends more smoothly than granulated sugar, making it the preferred choice for no-bake fillings.
Ingredient Alternatives
This recipe is adaptable without changing its overall character.
- Digestive biscuits, vanilla wafers, or oat cookies all make excellent crusts.
- Honey can replace part of the powdered sugar, though the filling may become slightly softer.
- Lime juice offers a brighter citrus flavor instead of lemon.
- Vanilla bean paste can replace vanilla extract for a more pronounced vanilla aroma.
Preparing Them Ahead
These cheesecake cups are ideal for entertaining because nearly all the work can be done in advance. Prepare the crusts and filling up to two days before serving. Keep the cups covered in the refrigerator and wait until just before serving to add fruit, nuts, or chocolate garnishes. This keeps the toppings looking fresh and prevents the crust from softening.
Serving Suggestions
Serve these cheesecake cups straight from the refrigerator for the best texture. They pair well with fresh berries, sliced kiwi, roasted nuts, or a spoonful of fruit compote. For a dessert platter, offer several topping options so everyone can customize their own cup. They’re equally suitable for brunch, picnics, holiday gatherings, or as a make-ahead weekday dessert.
Keeping Leftovers Fresh
Cover each cup tightly or store them in airtight containers in the refrigerator. They stay fresh for up to four days. The crust gradually softens over time, although the flavor remains excellent. If topped with fresh fruit, they’re best enjoyed within the first two days.
Can You Freeze Them?
Yes, Freeze the cheesecake cups without fresh fruit toppings for up to one month. Wrap each cup well to prevent freezer odors. Thaw overnight in the refrigerator before serving. The filling may lose a little of its airy texture after freezing but will remain creamy and enjoyable.
Nutrition Overview
Greek yogurt adds protein and a nice tangy flavor, while cream cheese gives you the rich, creamy texture you expect in classic cheesecake. Nutritional values will vary depending on the yogurt and cream cheese you use and any toppings you add. They are individually portioned, which makes it easy to portion them out for everyday enjoyment or for special occasions.
FAQs
1. Can I add flavored Greek yogurt?
Yes. Just cut back on the powdered sugar, as most flavored yogurt has sugar added to it.
2. Do these cheesecake cups need gelatin?
Nope. This recipe doesn’t use gelatin, as the cream cheese spontaneously firms up when the dessert chills.
3. Can I make them the night ahead?
Okay. Actually, overnight chilling gives the filling the best texture and flavor.
4. What if I don’t have graham crackers?
Digestive biscuits, vanilla wafers, or crushed oat cookies are all good options.
5. Can I make this recipe in one big dish?
Yes. Instead of separate cups, combine all in a shallow serving dish and chill until solid, then scoop it.
6. My filling is very soft. Why?
It normally needs a little longer time in the fridge, or the Greek yogurt may have had some more moisture. The key to perfect consistency is thick Greek yogurt and a minimum of 4 hours in the fridge.

Olivia Dawson is a food writer and recipe developer focused on creating clear, practical, and family-friendly cooking content. She specializes in approachable recipes made with everyday ingredients and well-explained methods that support confident cooking. Through Recipes With Olivia, Olivia shares thoughtfully crafted meal ideas designed to be reliable, enjoyable, and easy to recreate in everyday kitchens.