
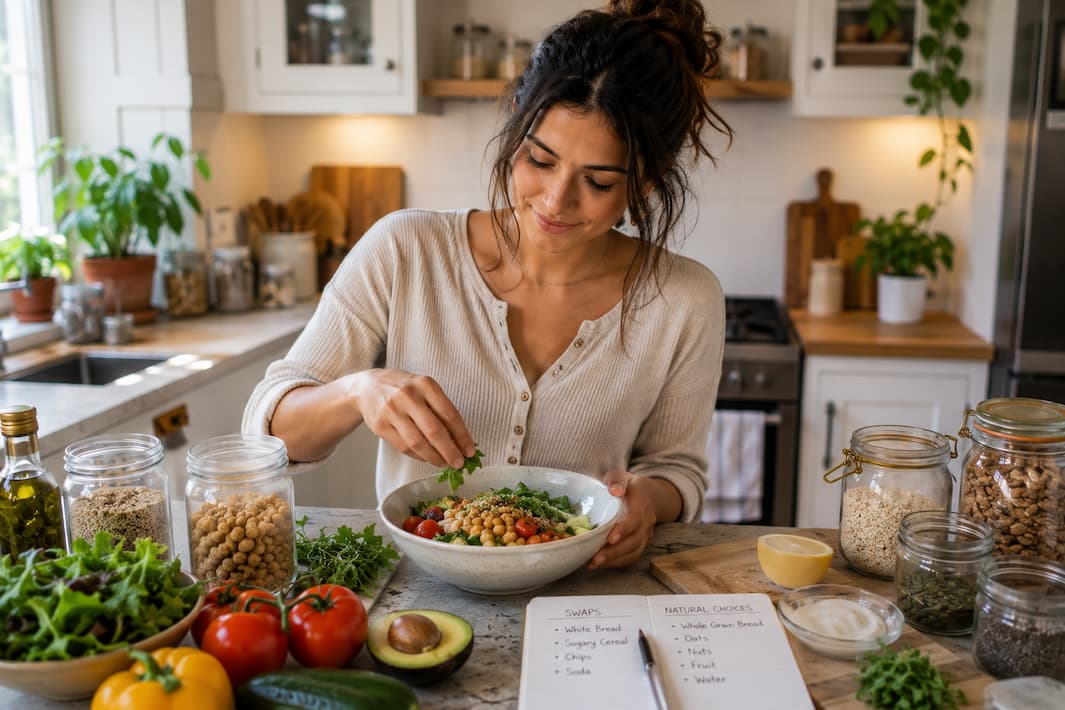
So I did something I’d been avoiding for years: I emptied the whole pantry onto my kitchen table. Everything with an ingredient list longer than five items went into a box for the food bank. Everything with words I couldn’t identify went straight into the trash. It felt wasteful and uncomfortable and a little bit extreme. But it also felt honest. For the first time, I was looking at what I was actually eating instead of what the packaging promised I was eating.
Then came the harder part: figuring out what to replace it all with. I didn’t have a bigger grocery budget. I didn’t have more time. What I had was a willingness to start over with simple, whole ingredients and a handful of recipes that could replace the convenience foods I’d relied on for years. The recipes below are what I developed during that transition. They’re not fancy. They’re not expensive. They’re just real food that happens to taste better than anything that comes in a box.
5 Whole Food Swap Recipes
1. Homemade Granola
The boxed granola I used to buy had honey in the name but high-fructose corn syrup in the ingredients. This version has six ingredients, takes ten minutes to prep, and makes your kitchen smell like a bakery. I make a batch every Sunday, and it lasts the whole week—on yogurt, with milk, or straight from the jar when I’m running late.
- 3 cups rolled oats (not instant)
- 1 cup raw almonds, roughly chopped
- ½ cup raw pumpkin seeds
- ¼ cup coconut oil, melted
- ⅓ cup pure maple syrup
- 1 teaspoon vanilla extract
- ½ teaspoon cinnamon
- ¼ teaspoon salt
- Preheat your oven to 325°F (165°C). Line a large rimmed baking sheet with parchment paper—this prevents sticking and makes cleanup almost nonexistent.
- In a large bowl, combine the rolled oats, chopped almonds, and pumpkin seeds. Stir them together so the nuts and seeds are evenly distributed throughout the oats.
- In a small bowl or measuring cup, whisk together the melted coconut oil, maple syrup, vanilla extract, cinnamon, and salt. Pour this over the oat mixture and stir until every piece is coated. It should look glossy and slightly sticky.
- Spread the mixture in an even layer on the prepared baking sheet. Press it down slightly with the back of a spoon—this helps it form clusters as it bakes.
- Bake for 25 to 30 minutes, stirring once halfway through, until the granola is golden brown and fragrant. It will still feel soft when you pull it out but will crisp up as it cools.
- Let cool completely on the baking sheet without stirring — this is what creates those satisfying clusters. Once cool, break into pieces and store in an airtight jar at room temperature for up to 2 weeks.
2. Black Bean and Veggie Tacos
Frozen tacos were my Tuesday night default — pop them in the microwave, eat in five minutes, feel vaguely dissatisfied. These take fifteen minutes of actual cooking and deliver ten times the flavor. The black beans are creamy and spiced, the vegetables add crunch and freshness, and you can customize the toppings based on what you have. My freezer still has emergency meals, but tacos aren’t one of them anymore.
- 1 can (15 oz) black beans, drained and rinsed
- 1 tablespoon olive oil
- 1 small onion, diced
- 2 cloves garlic, minced
- 1 teaspoon ground cumin
- ½ teaspoon chili powder
- ¼ teaspoon salt
- 6 small corn tortillas
- 1 cup shredded cabbage or lettuce
- 1 tomato, diced
- ½ avocado, sliced
- ¼ cup fresh cilantro, chopped
- 1 lime, cut into wedges
- Heat the olive oil in a skillet over medium heat. Add the diced onion and cook for 3 to 4 minutes until soft and translucent. Add the minced garlic and cook for 30 seconds more.
- Add the drained black beans, cumin, chili powder, and salt. Use the back of a spoon to mash about half the beans against the side of the pan—this creates a creamy texture while keeping some whole beans for bite. Cook for 5 minutes, stirring occasionally.
- While the beans cook, warm the tortillas. You can do this directly over a gas flame for 10 seconds per side (my favorite method — it adds a little char), or wrap them in a damp paper towel and microwave for 30 seconds.
- Divide the bean mixture among the warm tortillas. Top with shredded cabbage, diced tomato, avocado slices, and fresh cilantro.
- Squeeze fresh lime juice over each taco right before eating. The acidity ties everything together and makes the flavors pop.
3. Baked Sweet Potato Fries
The frozen sweet potato fries in my freezer had seventeen ingredients. A sweet potato has one. This was the swap that made me realize how much I was overpaying for food that had been processed into something worse than its original form. These fries are crispy and naturally sweet and take the same amount of time as the frozen version—you just have to cut a potato first.
- 2 large sweet potatoes
- 2 tablespoons olive oil
- ½ teaspoon salt
- ¼ teaspoon black pepper
- ½ teaspoon smoked paprika
- ¼ teaspoon garlic powder
- Optional: pinch of cayenne for heat
- Preheat your oven to 425°F (220°C). Place a baking sheet in the oven while it preheats—a hot pan is the secret to crispy fries without deep frying.
- Scrub the sweet potatoes and peel them if you prefer (I leave the skin on for extra fiber and a rustic look). Cut them into uniform matchsticks, about ¼ inch thick. The more uniform they are, the more evenly they’ll cook.
- Toss the cut sweet potatoes in a large bowl with olive oil, salt, pepper, smoked paprika, and garlic powder. Make sure every fry is coated — dry spots won’t crisp up.
- Carefully remove the hot baking sheet from the oven. Spread the fries in a single layer with space between them. Crowding is the enemy of crispiness.
- Bake for 25 minutes, flipping once halfway through, until the fries are golden and crisp at the edges. Some darker spots are actually desirable—that’s caramelization, and it tastes incredible.
- Let cool for 2 minutes on the pan (they crisp up more as they cool slightly), then serve immediately. These don’t hold well, so make what you eat.
4. Homemade Tomato Soup
I used to think canned tomato soup was a bargain until I realized a can cost $2.50 and contained mostly water, sugar, and salt. A pound of fresh tomatoes costs about the same, makes four times the soup, and tastes like actual tomatoes. This recipe is what I make when I want comfort food that doesn’t come with a side of regret. It’s velvety, deeply flavored, and ready in the time it takes to watch one episode of a sitcom.
- 2 lbs ripe tomatoes, roughly chopped (or 1 can 28-oz whole peeled tomatoes, drained)
- 1 tablespoon olive oil
- 1 small onion, diced
- 3 cloves garlic, minced
- 2 cups low-sodium vegetable broth
- ½ teaspoon dried basil
- ¼ teaspoon salt
- ¼ teaspoon black pepper
- 2 tablespoons heavy cream or coconut cream (optional, for richness)
- Fresh basil leaves, for garnish
- Heat the olive oil in a large pot over medium heat. Add the diced onion and cook for 5 minutes until soft and starting to turn golden at the edges. Add the minced garlic and cook for 1 minute until fragrant.
- Add the chopped tomatoes (with their juices if using fresh), vegetable broth, dried basil, salt, and pepper. Stir everything together and bring to a boil.
- Reduce heat to low, cover partially, and simmer for 20 minutes. The tomatoes should be completely broken down and the flavors melded together.
- Remove from heat. Use an immersion blender to puree the soup directly in the pot until completely smooth. If you don’t have an immersion blender, carefully transfer to a regular blender in batches and blend until smooth, then return to the pot.
- Stir in the heavy cream or coconut cream if using. This adds a silky richness that makes the soup taste restaurant-quality, but it’s perfectly good without it.
- Taste and adjust seasoning. Serve hot, garnished with fresh basil leaves. A slice of crusty bread on the side turns this into a full meal.
5. Energy Balls with Dates and Nuts
I used to spend $2 per protein bar without thinking about it. Then I did the math: $24 for a box of twelve bars, most of which were just candy with a fitness label. These energy balls cost about $0.40 each, take fifteen minutes to make, and keep in the fridge all week. They’re sweet, chewy, satisfying, and made from ingredients that grow in the ground instead of a laboratory.
- 1 cup pitted Medjool dates (about 10 to 12 dates)
- 1 cup raw almonds
- ¼ cup rolled oats
- 2 tablespoons natural peanut butter
- 1 tablespoon chia seeds
- 1 teaspoon vanilla extract
- ¼ teaspoon salt
- Optional: 2 tablespoons mini dark chocolate chips
- Optional: ¼ cup unsweetened shredded coconut, for rolling
- Soak the pitted dates in warm water for 5 minutes if they feel dry or stiff. Drain well and pat dry with a paper towel. Soft dates blend much more easily.
- Add the almonds to a food processor and pulse until they’re broken down into a coarse meal—think sand with some small pebbles. Don’t over-process, or you’ll get almond butter.
- Add the dates, oats, peanut butter, chia seeds, vanilla extract, and salt to the food processor. Pulse until the mixture comes together into a thick, sticky dough. It should hold together when you squeeze it. If it’s too dry, add a teaspoon of water. If it’s too wet, add a tablespoon more oats.
- If using chocolate chips, stir them in by hand after processing—otherwise the blades will pulverize them.
- Scoop out about 2 tablespoons of the mixture and roll between your palms into a firm ball. Repeat with the remaining mixture. You should get about 12 balls.
- If using coconut, roll each ball in the shredded coconut until lightly coated. This adds a nice texture and makes them look like little truffles.
- Store in an airtight container in the refrigerator for up to 2 weeks, or freeze for up to 3 months. They firm up nicely when cold and are perfect for grabbing on busy mornings.
Your Pantry Swap List
Here are ten processed staples I used to buy regularly and what I replaced them with. Most swaps saved me money. All of them improved how I felt.
| Instead of This | Buy This | |
|---|---|---|
| Boxed cereal | → | Rolled oats + nuts + dried fruit |
| Granola bars | → | Dates, nuts, seeds (make energy balls) |
| Canned soup | → | Canned tomatoes + broth + vegetables |
| Frozen fries | → | Russet or sweet potatoes |
| Frozen pizza | → | Whole wheat tortillas + sauce + cheese |
| Flavored yogurt | → | Plain yogurt + honey + fresh fruit |
| Bottled salad dressing | → | Olive oil + vinegar + mustard + salt |
| Instant oatmeal packets | → | Bulk rolled oats + cinnamon + brown sugar |
| Pre-made pasta sauce | → | Canned crushed tomatoes + garlic + olive oil |
| Store-bought bread crumbs | → | Stale bread, pulsed in a blender |
The Real Cost of Real Food
I used to think eating whole foods was more expensive. Then I started tracking what I actually spent. Here’s what a week of breakfasts looks like—and the numbers might surprise you.
The homemade version makes more servings for less than a third of the price. The same pattern holds across almost every swap: a bag of sweet potatoes costs less than frozen fries, canned tomatoes and broth cost less than canned soup, and dates with nuts cost a fraction of what protein bars charge. Whole foods aren’t a luxury — they’re often the budget option hiding in plain sight.
Start With One Swap
You don’t need to overhaul your entire kitchen this weekend. You don’t need to throw away everything in your pantry or feel guilty about the convenience foods you still rely on. What you need is one recipe — just one — that you make yourself instead of buying packaged.
Maybe it’s the granola on Sunday morning. Maybe it’s the tomato soup on a rainy Wednesday. Maybe it’s the energy balls you roll while listening to a podcast. Whatever it is, let it be easy. Let it be yours. And let it be the first step toward a kitchen filled with food you actually recognize.

Olivia Dawson is a food writer and recipe developer focused on creating clear, practical, and family-friendly cooking content. She specializes in approachable recipes made with everyday ingredients and well-explained methods that support confident cooking. Through Recipes With Olivia, Olivia shares thoughtfully crafted meal ideas designed to be reliable, enjoyable, and easy to recreate in everyday kitchens.